> ## Documentation Index
> Fetch the complete documentation index at: https://docs.subframe.com/llms.txt
> Use this file to discover all available pages before exploring further.
# Okta SSO
> Configure Okta single sign-on for your Subframe team.
This feature is only available on the Custom Plan. If you are an existing Custom Plan customer, continue with the
setup below. Once completed, contact us to enable SSO for your team.
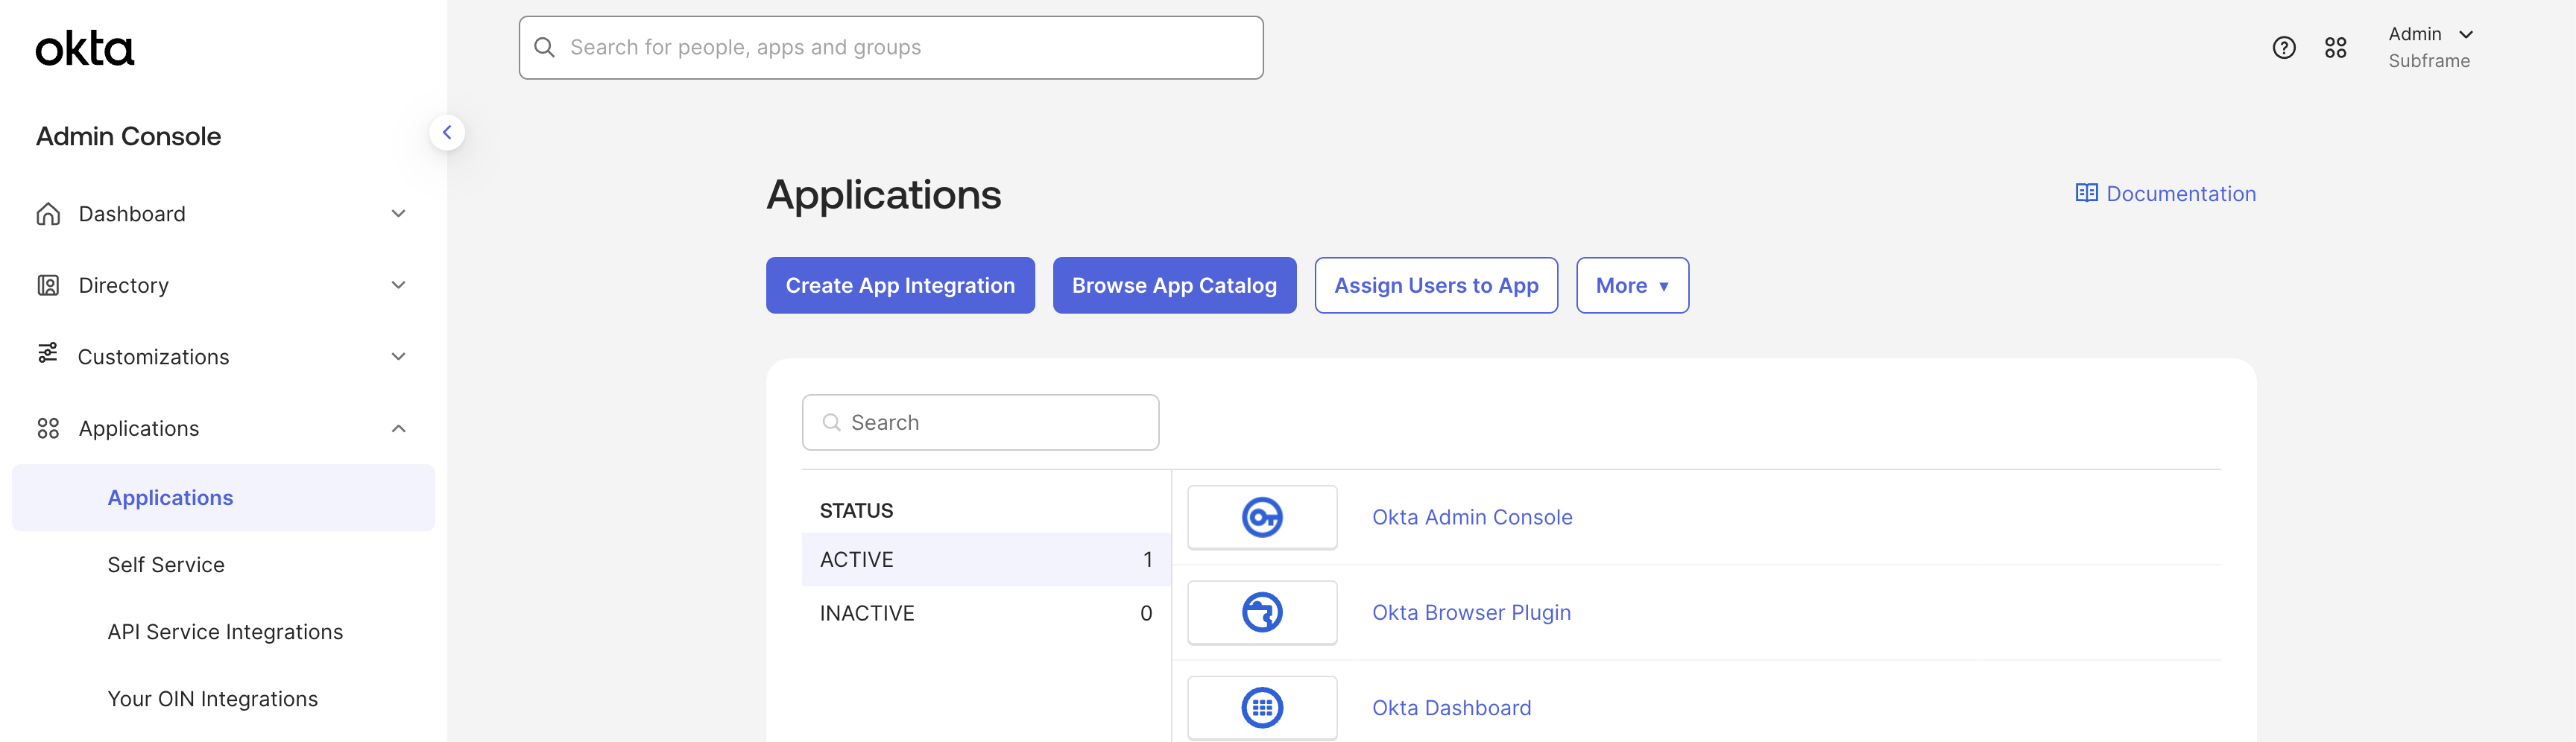
Navigate to the Applications dashboard of the Okta admin console. Click *Create App Integration*.
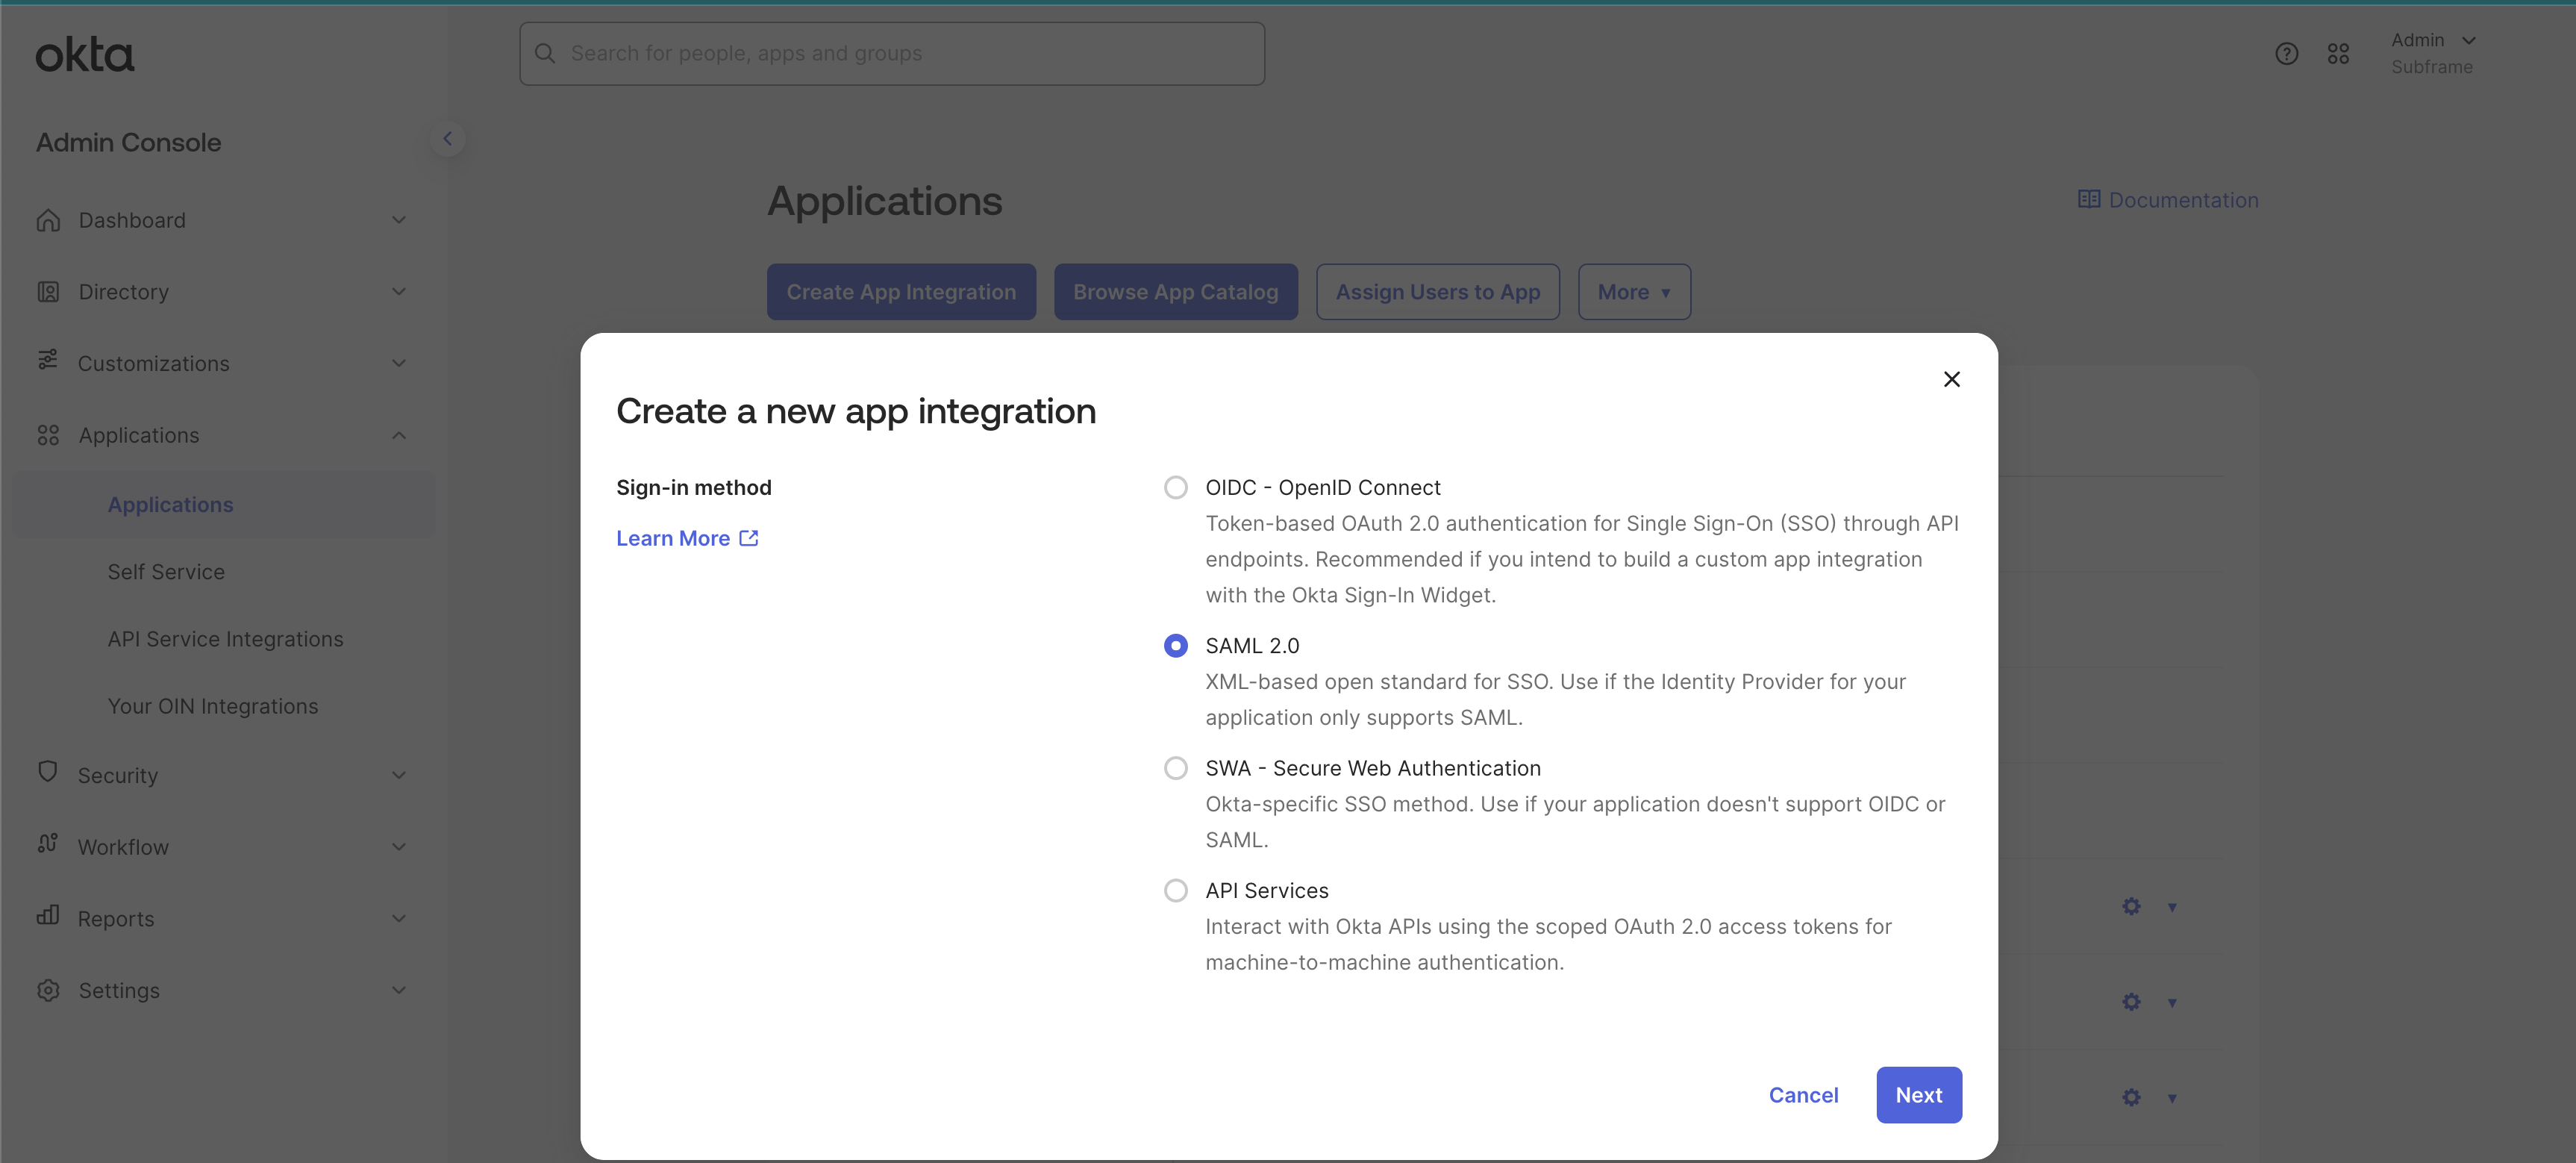
 Subframe supports the SAML 2.0 SSO protocol. Choose it from the *Create a new app integration* dialog.
 The information you enter here will be shown in your Okta applications menu. The App name should typically be **Subframe**.
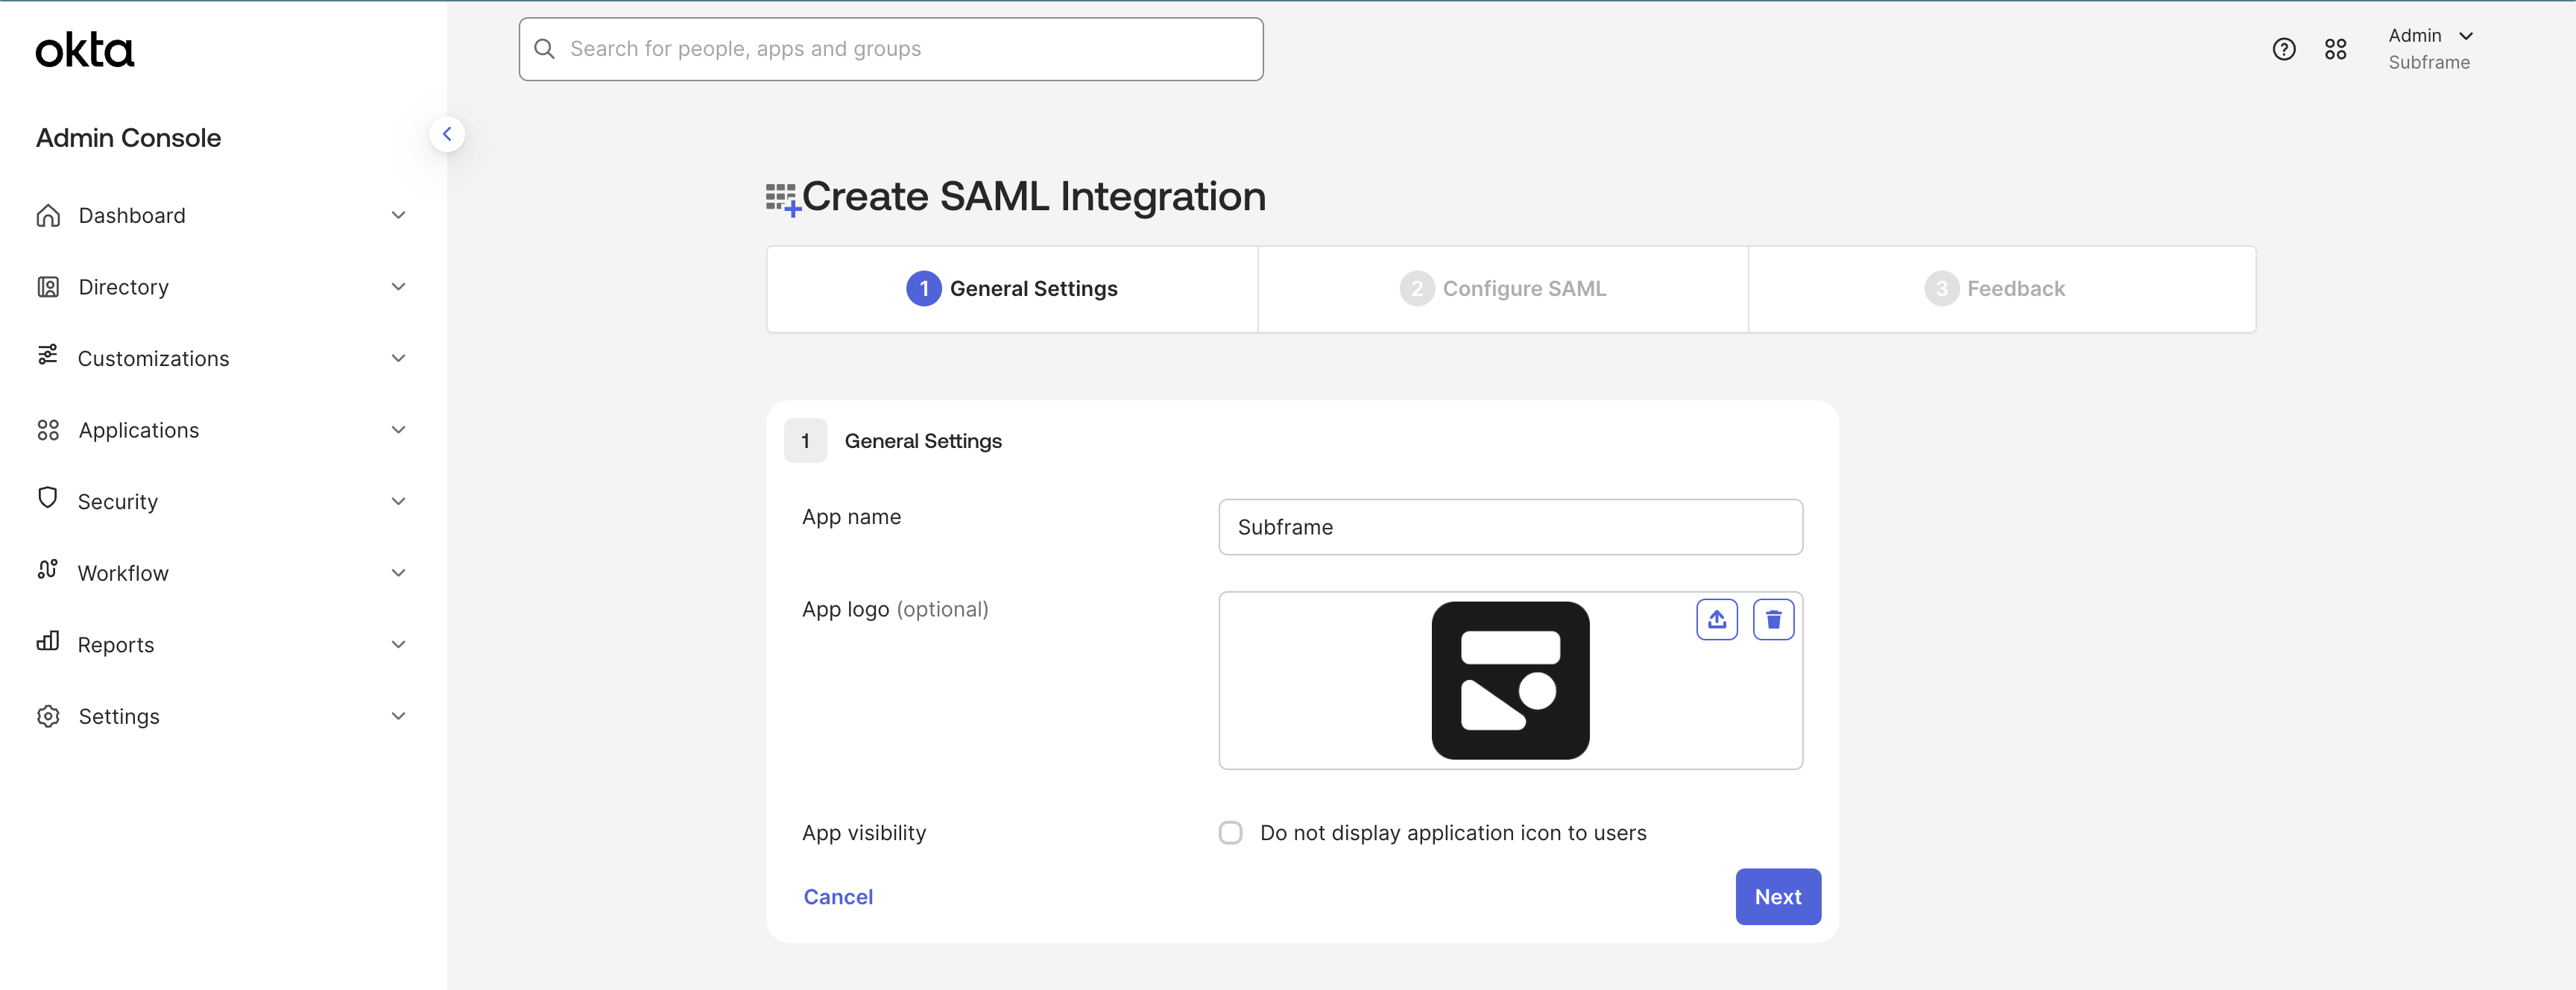 You can download the Subframe logo to upload as the **App logo** below:
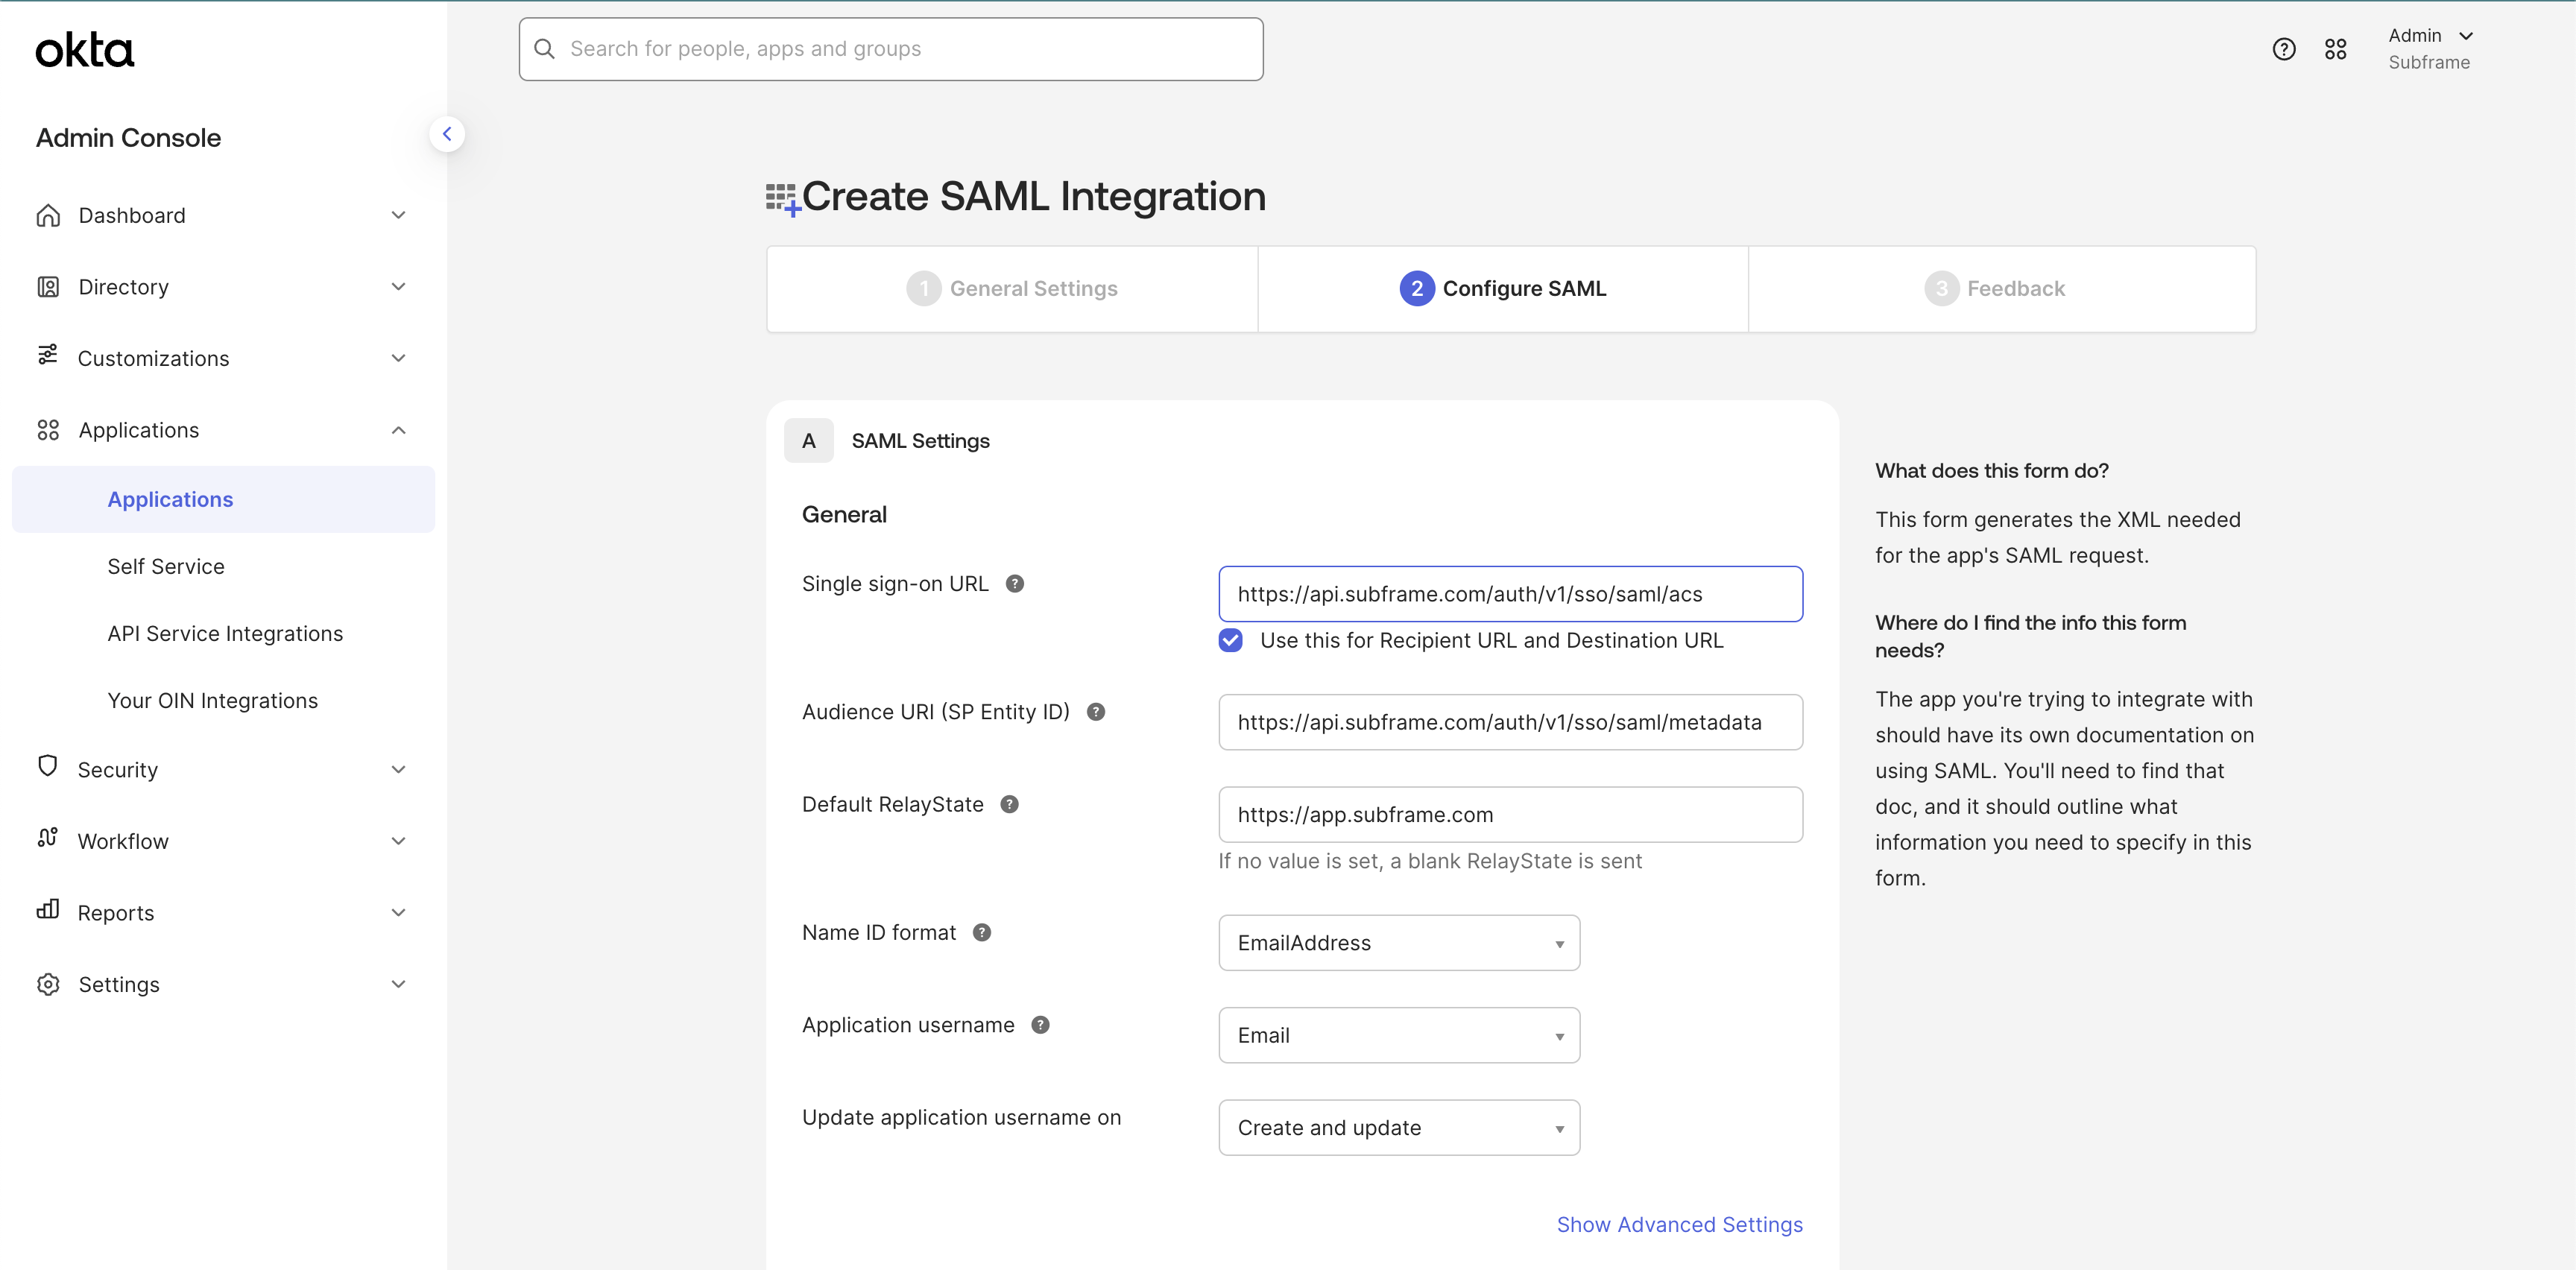
 These settings let Subframe use SAML 2.0 properly with your Okta application. Make sure you enter this information exactly as shown in this table and screenshot.
| Setting | Value |
| ---------------------------------------------- | ---------------------------------------------------- |
| Single sign-on URL | `https://api.subframe.com/auth/v1/sso/saml/acs` |
| Use this for Recipient URL and Destination URL | ✔️ |
| Audience URI (SP Entity ID) | `https://api.subframe.com/auth/v1/sso/saml/metadata` |
| Default `RelayState` | `https://app.subframe.com` |
| Name ID format | `EmailAddress` |
| Application username | Email |
| Update applicate username on | Create and update |
These settings let Subframe use SAML 2.0 properly with your Okta application. Make sure you enter this information exactly as shown in this table and screenshot.
| Setting | Value |
| ---------------------------------------------- | ---------------------------------------------------- |
| Single sign-on URL | `https://api.subframe.com/auth/v1/sso/saml/acs` |
| Use this for Recipient URL and Destination URL | ✔️ |
| Audience URI (SP Entity ID) | `https://api.subframe.com/auth/v1/sso/saml/metadata` |
| Default `RelayState` | `https://app.subframe.com` |
| Name ID format | `EmailAddress` |
| Application username | Email |
| Update applicate username on | Create and update |
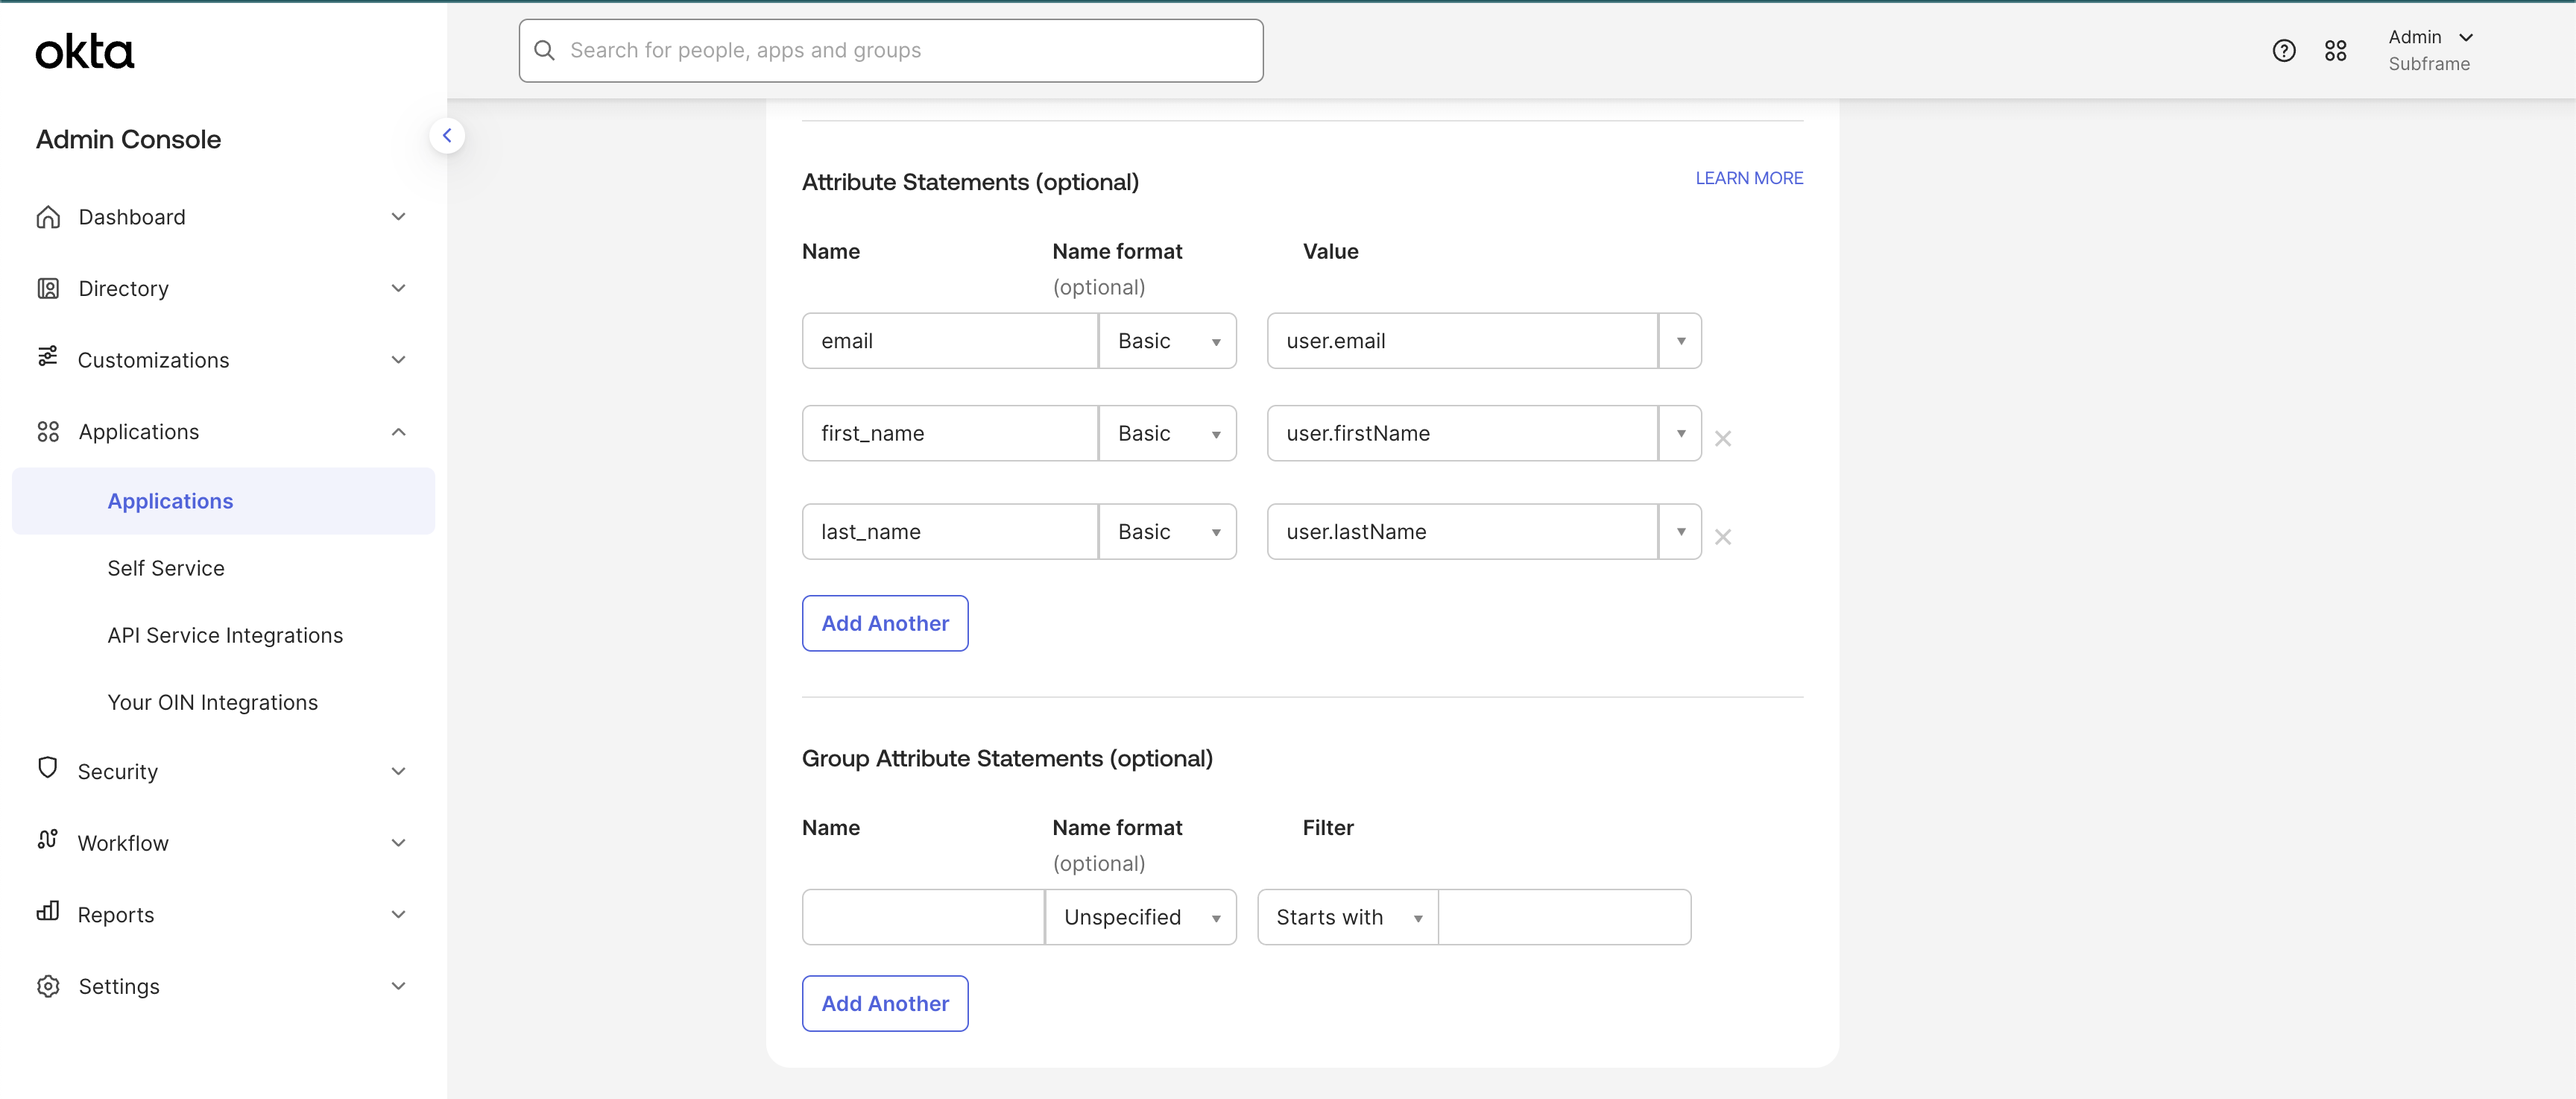
 Attribute Statements allow Subframe to get information about your Okta users on each login.
A `email` to `user.email` **statement is required**. Other mappings shown below are optional and configurable depending on your Okta setup. If in doubt, replicate the same config in the screenshot below.
Attribute Statements allow Subframe to get information about your Okta users on each login.
A `email` to `user.email` **statement is required**. Other mappings shown below are optional and configurable depending on your Okta setup. If in doubt, replicate the same config in the screenshot below.
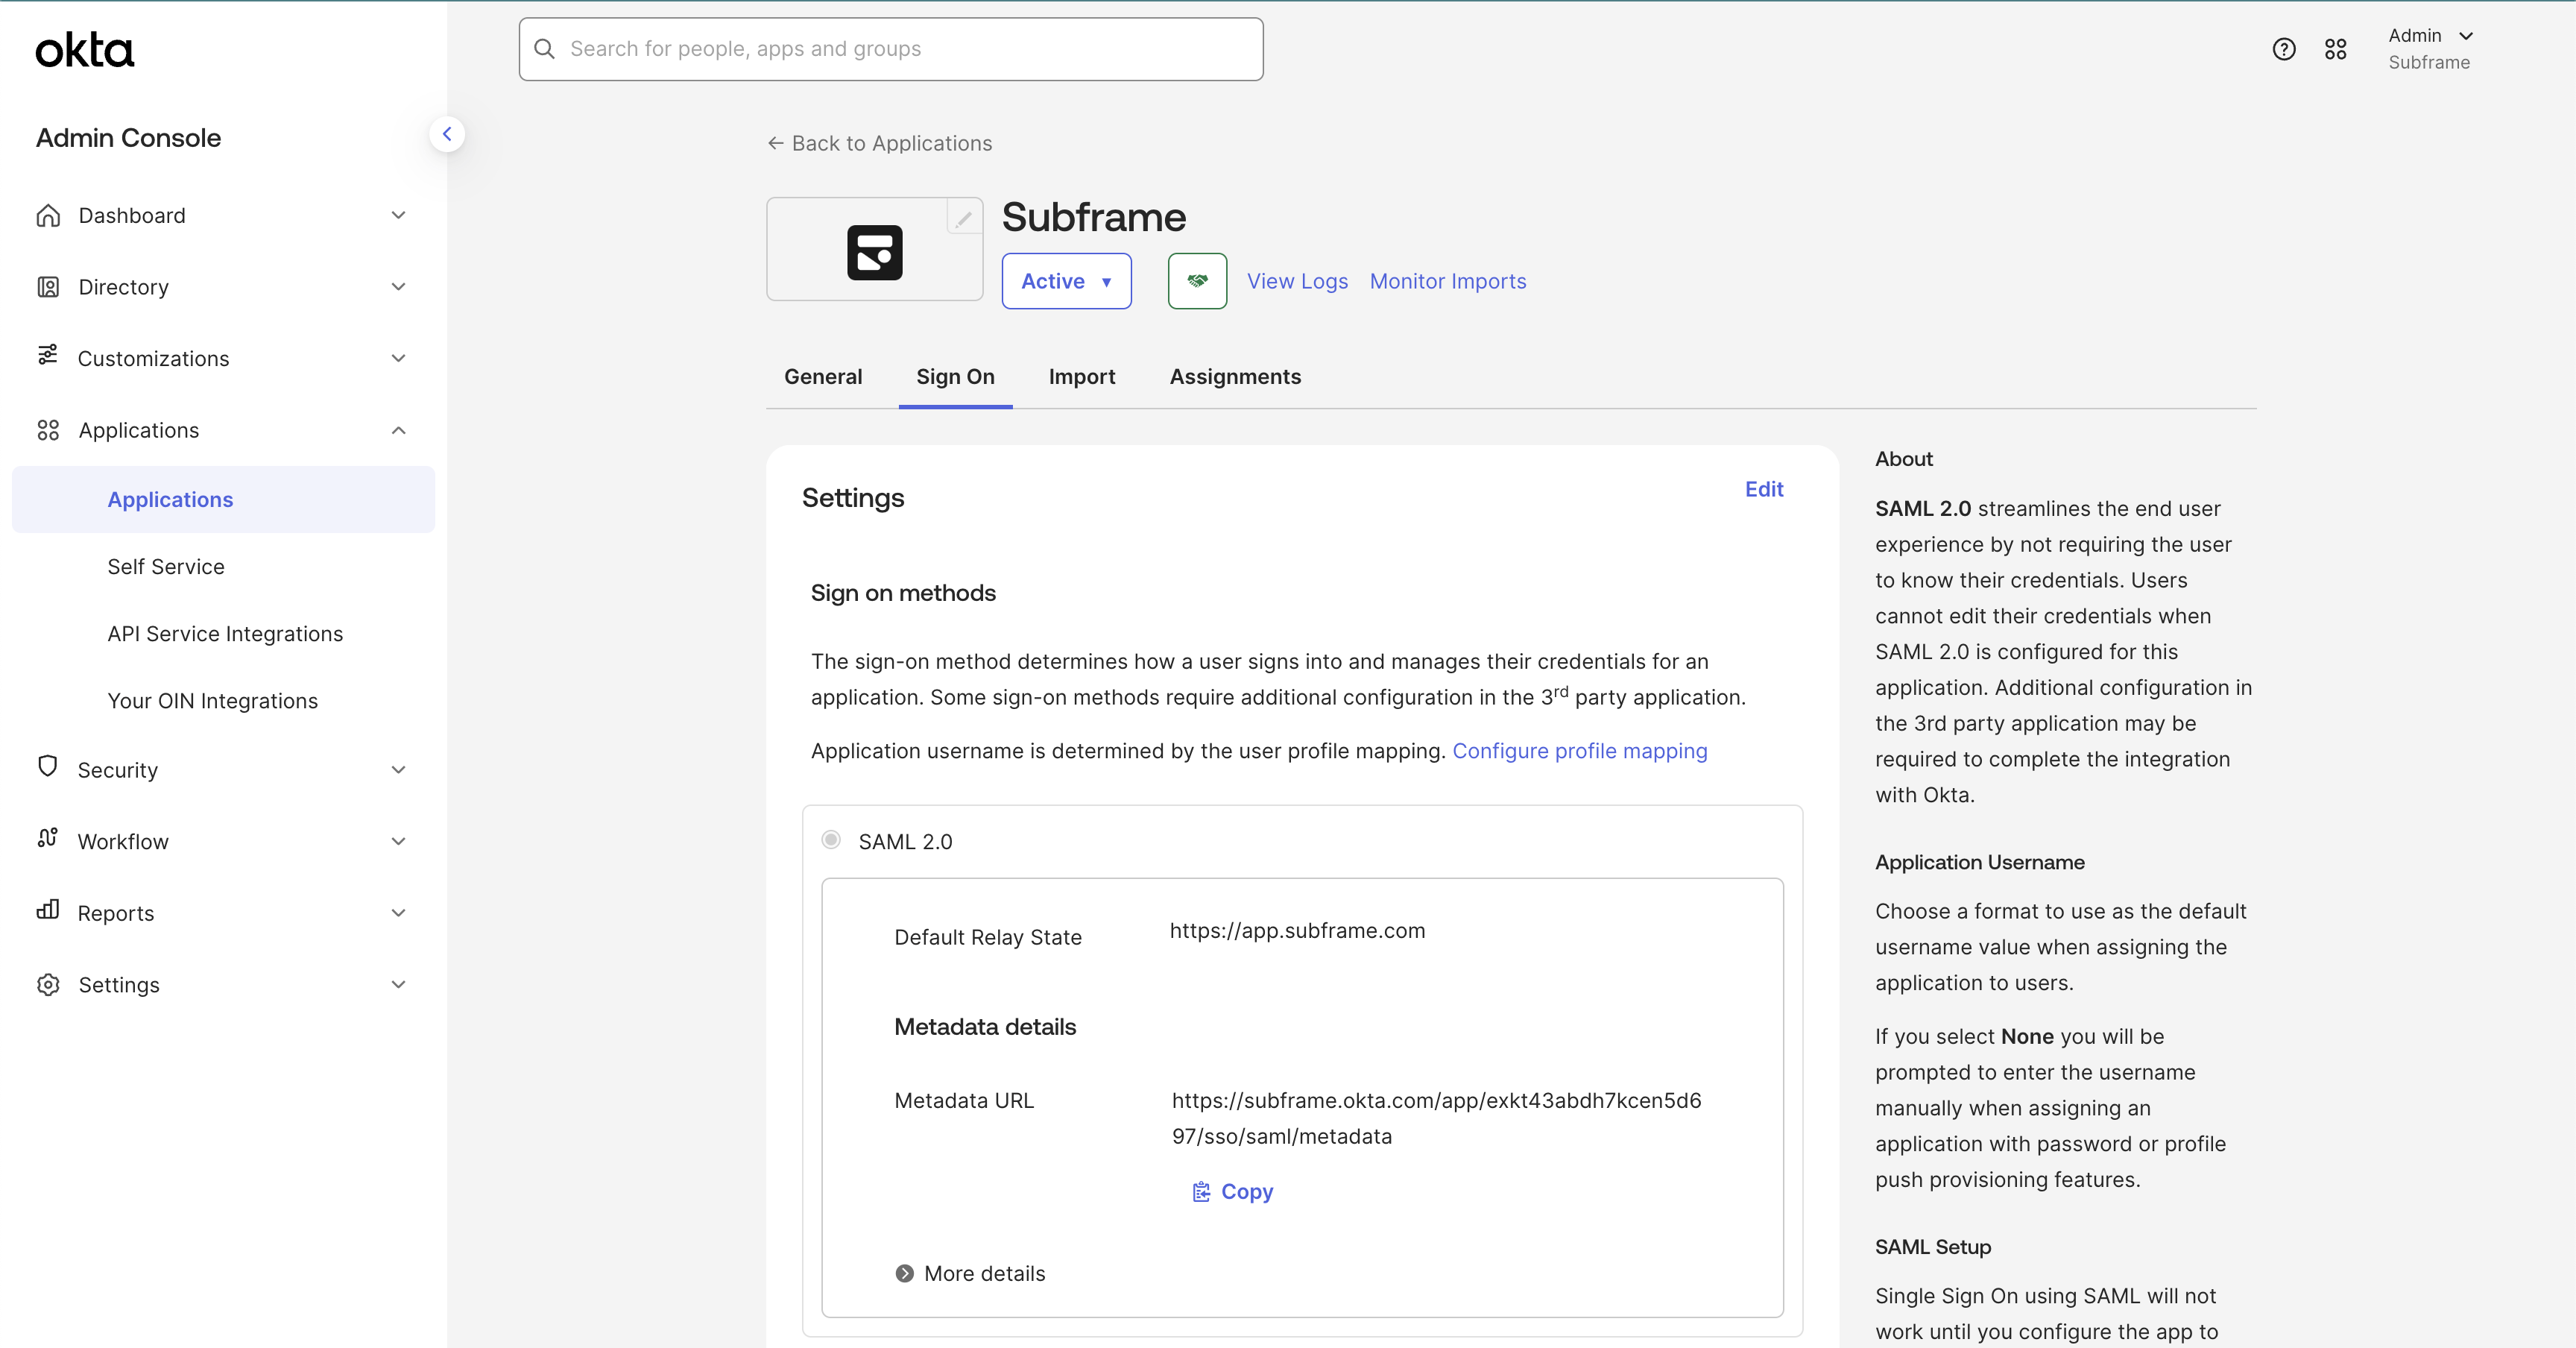
 Subframe needs to finalize enabling single sign-on with your Okta application.
After you finalize the creation of your Subframe Application in Okta copy the Metadata URL and send it to your Subframe contact. If you're not sure who to send this to or need further assistance, contact [support@subframe.com](mailto:support@subframe.com).
The Metadata URL usually has this structure: `https://.okta.com/apps//sso/saml/metadata`
Subframe needs to finalize enabling single sign-on with your Okta application.
After you finalize the creation of your Subframe Application in Okta copy the Metadata URL and send it to your Subframe contact. If you're not sure who to send this to or need further assistance, contact [support@subframe.com](mailto:support@subframe.com).
The Metadata URL usually has this structure: `https://.okta.com/apps//sso/saml/metadata`
 Once you’ve configured the Okta app as describe above, send the Metadata URL to your support contact at Subframe.
Wait for confirmation that this information has successfully been added to Subframe. It usually takes us less than 1 business day to configure this for your team.
Once you’ve received confirmation from your support contact at Subframe that SSO setup has been completed, you can ask some of your users to sign in with SSO via their Okta account.
All they need to do is enter their work email address when they choose to sign in with SSO.
If sign in is not working correctly, reach out to your support contact at Subframe for further guidance.
Once you’ve configured the Okta app as describe above, send the Metadata URL to your support contact at Subframe.
Wait for confirmation that this information has successfully been added to Subframe. It usually takes us less than 1 business day to configure this for your team.
Once you’ve received confirmation from your support contact at Subframe that SSO setup has been completed, you can ask some of your users to sign in with SSO via their Okta account.
All they need to do is enter their work email address when they choose to sign in with SSO.
If sign in is not working correctly, reach out to your support contact at Subframe for further guidance.